Overview: Create Sessions and QC Items
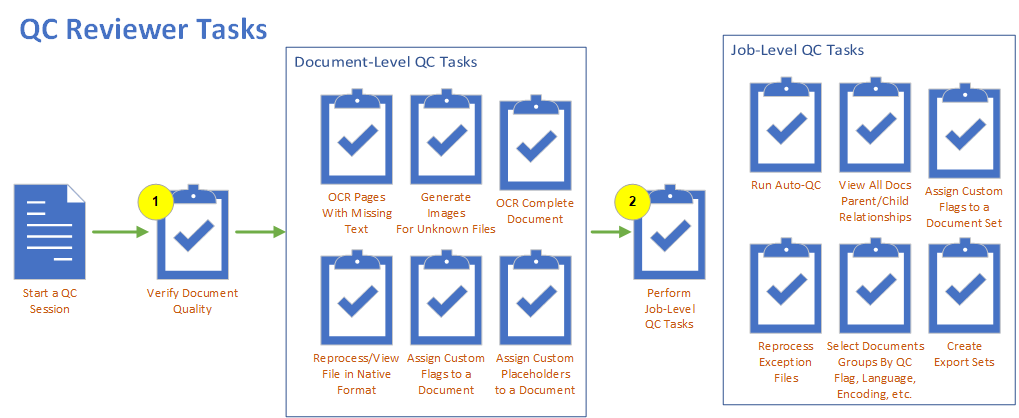
The basic QC process involves starting a QC session and fixing issues with items that were flagged during the data extraction or imaging processes for the selected Job. The following diagram is an overview of the most common tasks performed by QC reviewers but is not a complete list of QC reviewer tasks.
The following procedure outlines an example of a basic workflow:
-
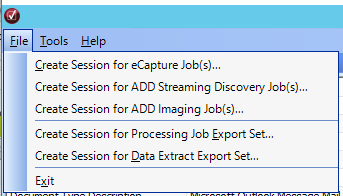
Start a QC session for a specific job type.

-
Select a Job to QC.
- Set the session criteria, which identifies the specific types of items you will QC during the session: Categories, Flags, Languages, Encoding, and Merge Jobs. For more information about starting sessions for different job types, see:
-
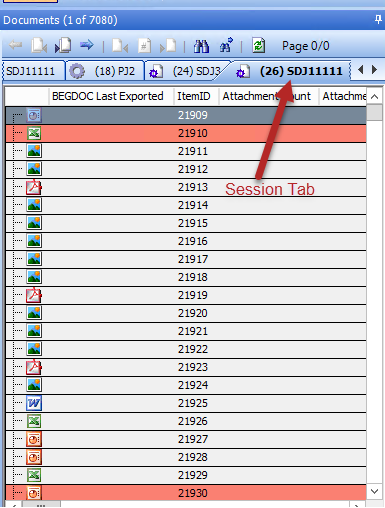
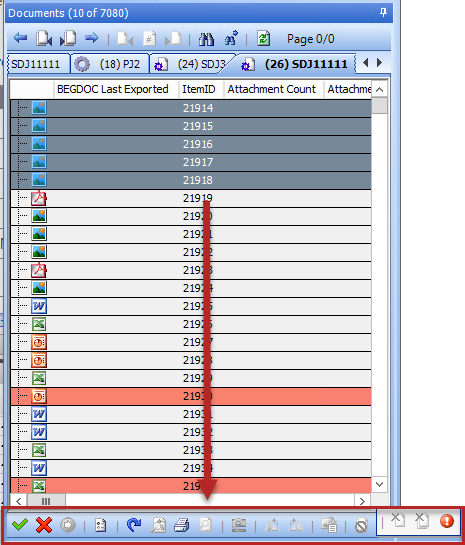
View the items to be QCed in the session tab for the selected job in the Documents window.

-
Review of the documents contained within the selected session by using the processing tools available on the QC Functions Toolbar. For instructions about how to QC documents, see QC Individual Items in the Documents Window.

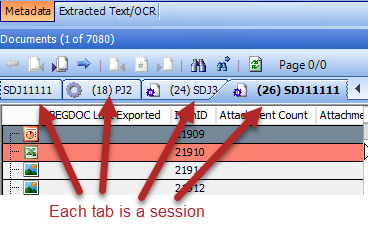
Note: The Documents window allows for multiple QC sessions.

Each session is defined by selecting categories and flag conditions (Passed QC, Exceptions and so on). For example, if you want to see all Microsoft Word documents that passed QC, when configuring the QC session, in the Start QC Session dialog box, you would select Microsoft Word under Select Document Type Categories, and on the Flags tab you would click Passed QC once. A green + sign then displays next to Passed QC.
After you have defined a session, it displays in the Documents to be QCed list box. There are three columns in the list box: Categories, Flagged, and Not Flagged. "Flagging" a document/page means that you are assigning a condition to that document/page, such as "Passed QC", "Threshold Exceeded", "Zero Bytes", and so on. For instructions about how to QC documents, see QC Individual Items in the Documents Window.
While QCing documents, you can take actions on one or more selected documents. When you QC items, you validate the items that completed ingestion/discovery but had processing errors (for example. limited metadata capture and OCR failed). The following sections describe some of the basic actions you can take as you QC items. You can use either the right-click context menu, or the Documents window toolbar buttons.
-
To use the right-click menu, select one or more documents in the Documents window, right-click the selected documents and then click one of the menu options.
-
To use the toolbar buttons, select one or more items in the Documents list window and click one of the QC buttons in the Documents window toolbar.

-
-
When you are finished QCing items, manually create an Export in the eCapture Controller that can be manually imported into a review application. For more information, see Overview: Exporting. If you have auto-loading configured, for Streaming Discovery and Enterprise Imaging (Enterprise Imaging) Jobs you are not required to manually push QCed items into an Eclipse/ Enterprise Review. When you QC and then reprocess an item that has been autoloaded into Eclipse, changes to the item that you make in QC are overlaid on the item in Eclipse. This happens automatically when you choose a reprocess option for items in a selection session. When you select items for reprocessing, in QC, the reprocessing is a single-threaded Job regardless of the number of items being reprocessed.
Note: In QC, you can create Export Sets. For example, you might create a search for a set of documents and then create an Export Set of only those items. For more information, see Overview: Export Sets.


QC Selected Items By Using the Right-Click Context Menu
In the Documents window, select one or more documents, and right-click the selected document(s).
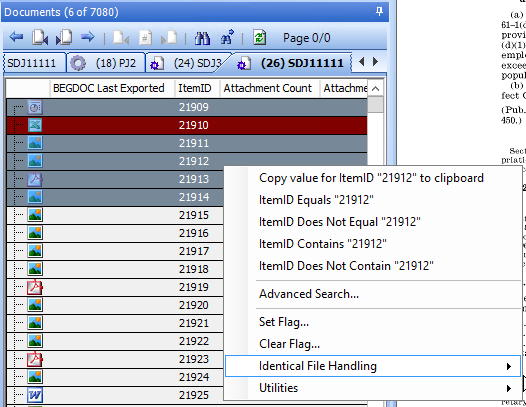
The right-context menu options in the Documents window allow you to:
-
Create an Export Set. For more information, see Create an Export Set.
-
Search through the current session, Job, Custodian or Case (Project). For more information, see Conduct a Session Search.
-
Refine an existing search. See Refine a Session Search.
-
Sort two or more column fields. For more information, see Modify Columns and Column Fields in the Documents Window.
-
Run a query on the selected item’s column field (for example, author) and select from: Equals to, Does not Equal, Contains, or Does not Contain. The system will return all the documents that match the selected criteria. In addition, an Advanced Search can be conducted in which you can further narrow a search. For more information, see Conduct a Session Search.
-
Set or clear a flag for all selected items. For more information, see Set or Clear a QC Flag for Selected Documents.
-
Sort the selected column field in ascending or descending order and modify existing fields. For more information, see Modify Columns and Column Fields in the Documents Window.
- Open the Output directory for a document. For more information, see Open the Output Directory for the Selected Document.
-
Close a session. For more information, see the section further down in this topic.
QC Items Using Tools on the Documents Window Toolbar
The toolbar located in the Documents window can be used to navigate through the Documents list and simultaneously display the selected item in the Image View area.
Click ![]() here to view a table that describes each of the actions associated with the buttons on the Documents window toolbar.
here to view a table that describes each of the actions associated with the buttons on the Documents window toolbar.
For more information on QCing selected items in the Documents window, see QC Individual Items in the Documents Window.
Perform Job-Level Actions on Session Tabs in the Documents Window
You can create a session for a Standard Processing Job, Data Extract Job, Streaming Discovery Job, or Enterprise Imaging job. You can create more than one. For each session you create, the Documents List tab displays a corresponding tab with a list of items in the selected job that meet the conditions that you selected when starting the session. For example, you may have selected the Category Microsoft Word, and then selected the Passed QC flag. When you mouse over the session tab, it shows this information. When you right-click a session tab, a context menu appears.
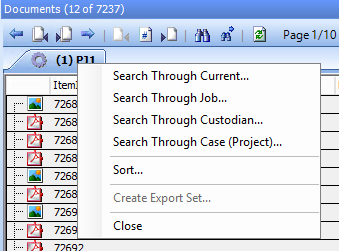
From the right-click context menu, you can :
- Search through a session's job, custodian, or case (project) and refine your search. For more information, see Conduct a Session Search.
- Sort the column fields. For more information, see Modify Columns and Column Fields in the Documents Window.
- Close the session. For more information, see the section further down in this topic.
- Create Export Sets. For more information, see Create an Export Set.
Delete an Ipro® for enterprise Imaging Job
|
|
Note: The Queue Manager must be running in order to perform deletions of Enterprise Imaging Jobs. |
After no further QC work is required for an Enterprise Imaging Job, it may be deleted directly from the Cloud Imaging Jobs list. Only the database and working directories are deleted. The output data is not deleted and are visible in Eclipse/Enterprise Review for each document.
To delete an Enterprise Imaging Job, right click the Job to display the context menu and choose Delete to remove the Job from the list.
Close a Session or Search Tab
You may close a session or search tab without affecting any other session or search tabs.
Right-click the tab to display the context menu and select Close.
Related Topics
QC Individual Items in the Documents Window
Start a QC Session for a Standard Data Extract Job
Start a QC Session for a Standard Processing Job